


Passivation is one of those processes that sounds optional—until you see a “stainless” part develop rust-colored spots around a machined edge, a tapped hole, or a weld seam. In most cases, the stainless alloy isn’t the problem. The problem is what happened on the surface during manufacturing: trace free iron, shop dust, smeared metal, or heat tint that interferes with stainless steel’s protective oxide layer.
This guide explains how to passivate stainless steel in practical terms: what passivation really does, when to specify it, what chemicals are used (citric vs nitric), what a real shop process looks like, what “at-home passivation” can and cannot accomplish, and how passivation is verified under common standards.
Safety note: industrial passivation involves hazardous chemicals and controlled handling. Always follow the chemical supplier’s SDS, local regulations, and appropriate PPE/ventilation requirements. This article is informational—not a substitute for safety training.
What “Passivation” Means in Simple Terms?
Stainless steel resists corrosion because it forms a thin, invisible “passive” film—primarily chromium oxide—on its surface. Under normal conditions, that film forms naturally when clean stainless is exposed to oxygen in air or water.
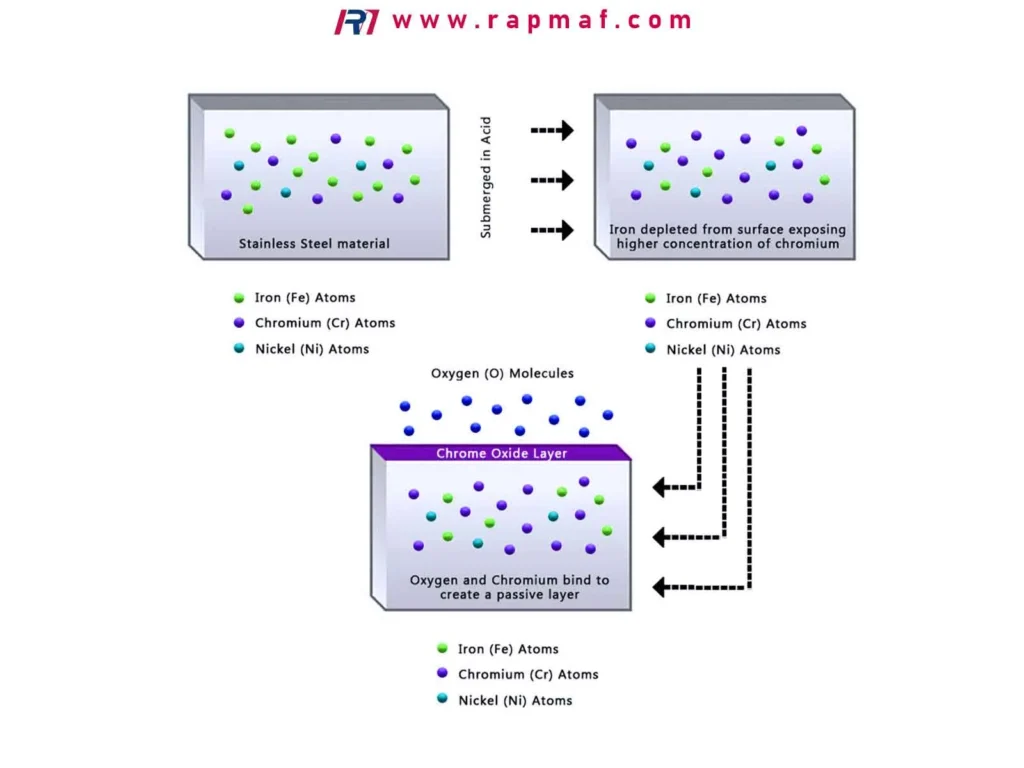
Passivation is a chemical treatment (done after proper cleaning) that:
- removes free iron and other surface contaminants, and
- helps the stainless surface reform a more uniform, corrosion-resistant passive layer.
Passivation is NOT a coating
Nothing thick is applied. You’re not adding a protective layer like plating, anodizing, or paint. You’re improving the condition of the surface that’s already there.
Passivation is NOT always the same as pickling
People often mix these up:
- Pickling: aggressive acid treatment to remove heavy oxides/scale (especially weld heat tint) and sometimes a small amount of base metal.
- Passivation: targeted removal of surface iron contamination and support for passive film formation.
A simple rule of thumb:
- Machined parts often need passivation.
- Welded parts may need pickling (or electropolishing) first, then passivation.
Why Stainless Rusts After Machining (And How Passivation Helps)
If you’ve ever seen orange-brown specks on stainless, it’s usually one of these:
- Free iron contamination
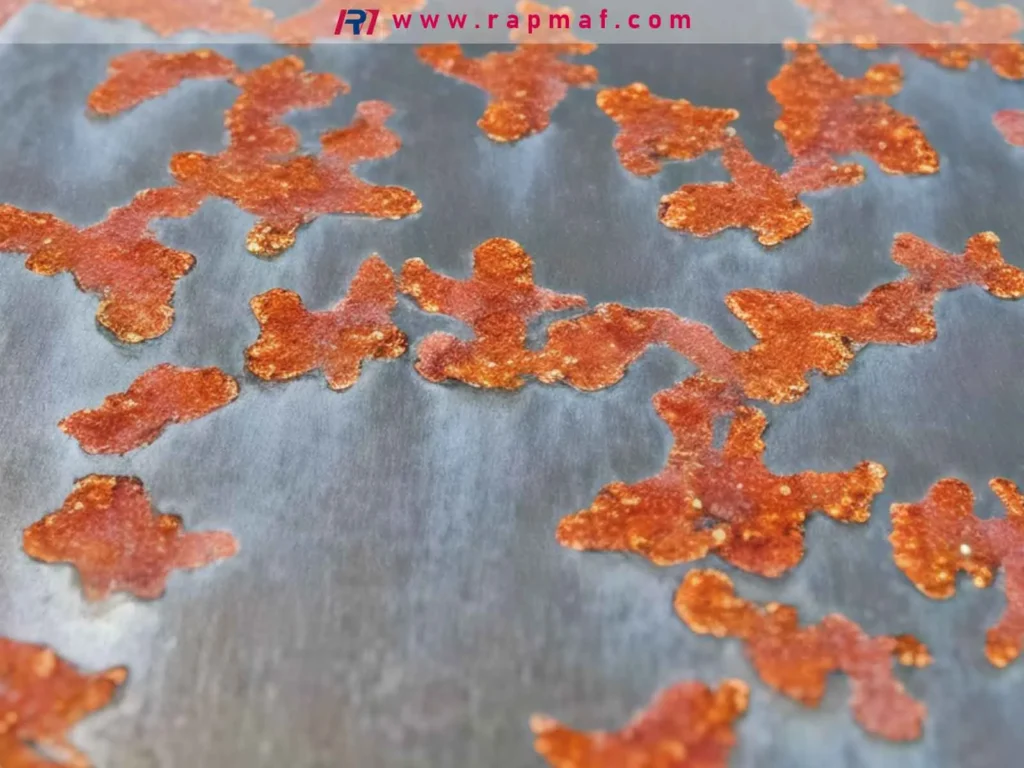
- From cutting tools, fixtures, chips, wire brushes, or even steel racks.
- The stainless surface gets “seeded” with iron that rusts first.
- Smeared metal / embedded particles

- Some machining and abrasive processes can smear metal across the surface.
- This can trap contamination or create localized corrosion cells.
- Heat tint from welding

- Heat tint is an oxide layer that can deplete chromium beneath it.
- That region can corrode more easily if not properly treated.
Passivation addresses the first two problems very well—especially when the parts are cleaned correctly beforehand. It can reduce the probability of cosmetic rust spots, improve corrosion resistance consistency, and satisfy customer or regulatory requirements.
Real-world example (common in production)
A batch of 304 stainless brackets looks perfect when shipped. Two to four weeks later, the customer reports “rust freckles” near the laser-cut edges and tapped holes. Investigation finds the parts were:
- machined with coolants not fully removed,
- handled on shared steel benches, and
- stored near carbon-steel components during packing.
A proper sequence—degrease → passivate → rinse/dry → clean packaging—typically prevents this exact failure pattern.
When Is Passivation of Stainless Steel Required?
You should consider passivation when:
- the drawing/spec explicitly calls it out (common in regulated industries),
- you need consistent corrosion performance, or
- appearance matters and “rust specks” would trigger returns.
Common industries that specify passivation
- Medical devices and lab equipment
- Food and beverage processing hardware
- Pharmaceutical and biotech equipment
- Aerospace and defense
- Marine and outdoor hardware
- Chemical processing
Common times to passivate
- After CNC machining (most common)
- After grinding/polishing (especially if media could introduce contamination)
- After bead blasting (if media/cabinet cleanliness is uncertain)
- After welding (often after pickling/electropolish, depending on spec)
What Chemical Is Used to Passivate Stainless Steel?
The two main passivation chemistries you’ll see are:
Citric acid passivation
Pros
- Generally lower hazard than nitric-based systems (still needs PPE and controls)
- Often easier on facilities and waste treatment
- Effective at removing free iron when run to a standard method
Cons
- Not every legacy spec or customer accepts it without qualification
- Like any passivation, results depend heavily on cleaning, time, temperature, and concentration
Nitric acid passivation
Pros
- Long history in industrial and aerospace supply chains
- Very effective for many stainless grades
Cons
- Higher hazards (fumes, burns, handling requirements)
- More regulatory and waste-treatment complexity
- Some older processes used dichromates (less common today due to environmental controls)
Bottom line: many modern shops and specs allow either citric or nitric methods under ASTM A967, while some aerospace or legacy programs may require AMS 2700 methods and documentation. Always follow the drawing or customer flow-down requirements first.
How to Passivate Stainless Steel in a Professional Shop (Process Overview)
Most compliant passivation lines follow a controlled sequence. Exact parameters vary by standard and alloy, but the structure is consistent.
1) Pre-cleaning / degreasing (non-negotiable)
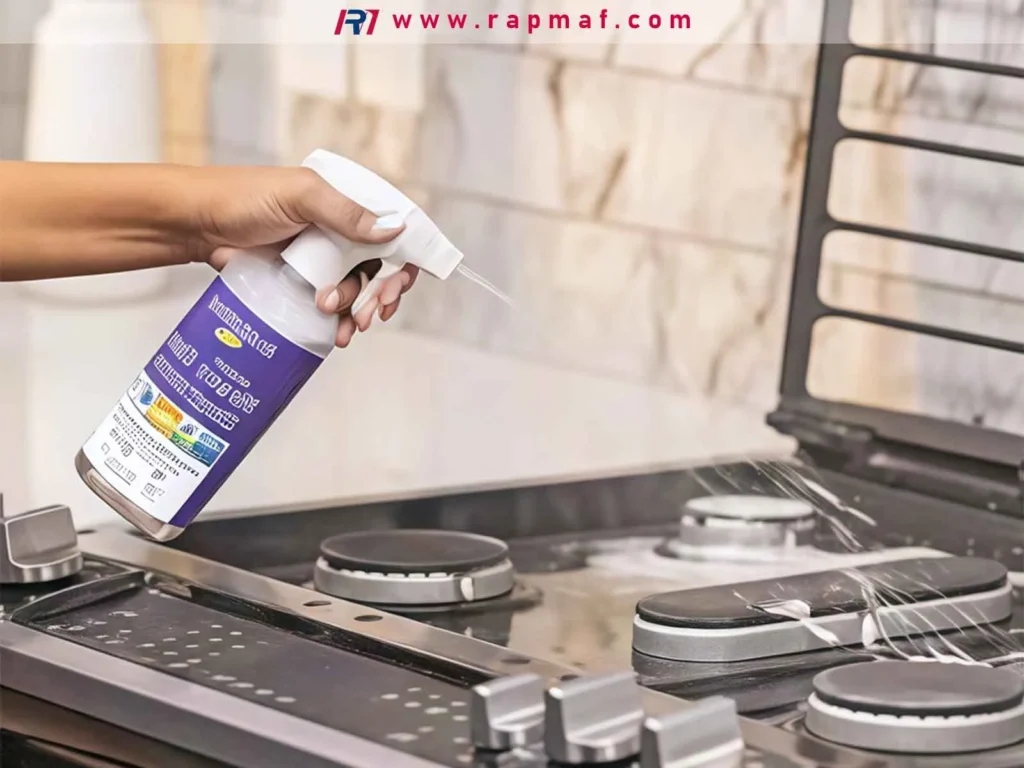
Goal: remove oils, coolant residue, polishing compound, fingerprints, and shop soils.
Typical methods:
- alkaline wash or detergent cleaning
- ultrasonic cleaning (for complex parts)
- high-quality rinse
Why it matters: if oil remains, acid contact is inconsistent, and passivation becomes patchy.
2) Passivation bath (citric or nitric)
Goal: remove free iron and prepare the surface to form a uniform passive film.
Key controls:
- solution concentration
- bath temperature
- immersion time
- agitation/flow
- part orientation (avoid trapped bubbles in cavities)
3) Rinsing (often multi-stage)

Goal: remove all residual chemistry and dissolved contaminants.
Rinse water quality matters—especially chlorides.
4) Neutralization (when required)
Some processes include neutralization steps depending on chemistry and spec.
5) Drying and clean handling
Goal: prevent water spotting, chloride residues, and recontamination.
Good practices:
- clean gloves (avoid bare-hand handling on critical surfaces)
- clean racks/totes dedicated to stainless
- sealed bags or clean packaging if required
6) Testing / verification + documentation
If you need certs or compliance, you confirm passivation with defined tests (details below) and provide documentation per the standard.
How to Passivate Stainless Steel With Citric Acid (Practical Notes)
Citric passivation is often chosen for machined stainless parts because it’s effective and more manageable in many facilities.
To make citric passivation work reliably:
- Start with a truly clean surface (cleaning step is the difference between “works” and “doesn’t”)
- Use validated chemical products and run them per a recognized method (e.g., ASTM A967 method types)
- Control bath variables and avoid cross-contamination in tanks, racks, and rinse stations
Where citric can struggle:
- parts with heavy weld heat tint (you may need pickling/electropolishing first)

- severe embedded iron from poor abrasive practices (may need process correction upstream)
How to Passivate Stainless Steel With Nitric Acid (Practical Notes)
Nitric-based passivation remains common in some supply chains. If nitric is required by a customer or standard:
- facilities must manage fumes, corrosion-resistant equipment, PPE, and waste neutralization
- process control is essential to avoid over-etching or surface issues
- proper rinsing/drying is critical to avoid staining or residue
Nitric passivation is not a “better by default” choice—it’s a spec-driven choice in many cases.
How to Passivate Stainless Steel at Home (What’s Realistic vs Risky)
Searches like “how to passivate stainless steel at home” usually come from people trying to remove light rust staining on:
- kitchen items
- bathroom fixtures
- stainless tools
- consumer hardware
What you can do at home (reasonable)
- remove surface stains and light contamination
- help stainless repassivate naturally after cleaning
Practical home steps:
- clean with a non-chloride stainless cleaner
- avoid carbon-steel brushes or steel wool (they can embed iron)
- rinse thoroughly and dry fully
What you should not do at home (for most people)
- nitric acid passivation (hazardous)
- attempting “DIY ASTM A967 compliance”
- expecting kitchen products to replace process control, documentation, and verification
If your end use is industrial (food/pharma/medical/aerospace) or you need certs, home methods are not equivalent.
Does Bar Keepers Friend Passivate Stainless Steel?
Bar Keepers Friend (commonly oxalic-acid based) can:
- remove stains
- reduce the appearance of rust spots
- improve surface cleanliness
But it’s not a controlled, spec-based passivation process. It won’t provide:
- method traceability
- standard test results
- consistent performance on complex geometries or internal passages
Use it for household cleanup; specify ASTM/AMS passivation for engineered parts.
Does Vinegar Passivate Stainless Steel?
Vinegar is dilute acetic acid. It can help remove some residues and may improve appearance, but it’s not a reliable substitute for industrial passivation. Results vary, and you’re not controlling:
- concentration
- exposure time and temperature
- rinse quality
- contamination sources before/after treatment
Also, vinegar doesn’t solve the underlying issue if your process is embedding iron or using contaminated abrasive media.
How to Check Passivation of Stainless Steel (Verification Methods)
Verification can mean different things: cleanliness, free-iron removal, or corrosion performance.
1) Water-break test (cleanliness indicator)
If water sheets uniformly over the surface, it suggests the part is clean. If it beads or breaks, oils may remain.
This is useful, but it does not fully prove passivation quality.
2) Copper sulfate test (free iron detection)
Often used to detect free iron contamination. If free iron is present, copper can deposit and indicate a failure condition per the test method.
3) Salt spray / corrosion exposure testing
Used to evaluate corrosion resistance under controlled exposure. It’s more time-consuming but closer to “real performance.”
4) Spec-defined methods under ASTM A967 / AMS 2700
These standards define acceptable processes and test options. The right test depends on:
- alloy
- application
- customer requirements
- failure risk (cosmetic vs functional vs regulatory)
Common Problems That Make Passivation “Fail” (Even If You Paid for It)
- Poor pre-cleaning
Residual oils block chemical contact. - Cross-contamination after passivation
Clean parts placed on steel tables, handled with dirty gloves, or packed with mixed metals can pick up iron again. - Contaminated blasting media
If the cabinet or media has seen carbon steel, it can contaminate stainless. - Weld heat tint not properly removed
Passivation does not always remove heat tint or restore chromium-depleted areas. - Wrong alloy choice for the environment
Example: 303 is free-machining but often a poor choice for chloride-heavy environments compared to 316/316L.
If I Were Choosing: A Practical Decision Guide
Here’s how I’d decide what to call out on a drawing or what to request from a supplier.
Scenario A: Machined 304/316 parts, no welding, general corrosion resistance needed
- Specify ASTM A967 passivation
- Allow citric or nitric unless your customer requires one
- Add a free-iron test if returns would be costly
Scenario B: Medical/food/pharma parts where documentation matters
- Specify the exact standard (ASTM A967 or AMS 2700 as required)
- Require certification and the verification method (e.g., copper sulfate)
- Control handling/packaging to prevent recontamination
Scenario C: Welded stainless assembly (heat tint present)
- Plan for pickling or electropolishing (depending on finish and geometry)
- Then passivate and verify per the required standard
Scenario D: Cosmetic stainless where appearance drives returns
- Specify passivation plus a packaging requirement (clean bagging, no contact with carbon steel)
- Consider a defined surface finish and cleaning method to reduce fingerprinting and water spots
RFQ Checklist: What to Send So You Get the Right Passivation
To avoid vague quotes and inconsistent results, include this in your RFQ:
- Material / grade (304, 316L, 17-4PH, 410, 420, 303, etc.)
- Manufacturing steps (CNC only, welded, bead blasted, polished, heat treated)
- Standard requirement (ASTM A967? AMS 2700? internal spec?)
- Surface finish and cosmetic zones (Ra target, brushed direction, “no discoloration” areas)
- Corrosion environment (marine, chlorides, cleaning chemicals, outdoor)
- Verification needed (water-break, copper sulfate, salt spray duration, cert package)
- Packaging/handling requirements (clean bagging, desiccant, VCI, no mixed-metal contact)
- Quantity and schedule (prototype vs production; lot size matters for process planning)
A good supplier should respond with:
- recommended passivation method (citric vs nitric) based on spec and alloy
- process flow notes (cleaning steps, special handling)
- verification plan and documentation offered
- clear pricing and lead time impact
References (Standards & Technical Sources)
- SAE AMS 2700 — Passivation of Corrosion Resistant Steels (official listing): https://www.sae.org/standards/content/ams2700/
- NIST (measurement and materials reference context): https://www.nist.gov/