



Hello, I’m Clive Chen, an engineer at Rapmaf. It’s interesting how a single word can have completely different meanings depending on your profession. If you type “What are the steps in plating?” into a search engine, you’ll be flooded with articles about culinary arts—the “classic,” “asymmetrical,” and “minimalist” techniques for arranging food on a plate.
But in the world of engineering and manufacturing, “plating” means something entirely different.
For us, plating is a sophisticated surface finishing process where a thin layer of metal is deposited onto a substrate, which we call the part or workpiece. It’s not about aesthetics alone; it’s a critical engineering step used to impart specific properties to a part that it doesn’t inherently possess. We plate parts to protect them from corrosion, to make them harder and more resistant to wear, to increase their electrical conductivity, or to prepare them for soldering
Why Do We Plate Parts?
Before we get into the “how,” let’s establish the “why.” A manufacturer doesn’t add a plating step—which adds cost and complexity—without a very good reason. The decision to plate a part is driven by a need to enhance its performance in one of five key areas:
1.Corrosion Resistance: This is the most common reason. A sacrificial layer of a more reactive metal, like zinc on steel (galvanization), will corrode first, protecting the underlying steel from rust. A noble metal layer, like gold or nickel, can form a durable, non-reactive barrier against moisture and oxygen.
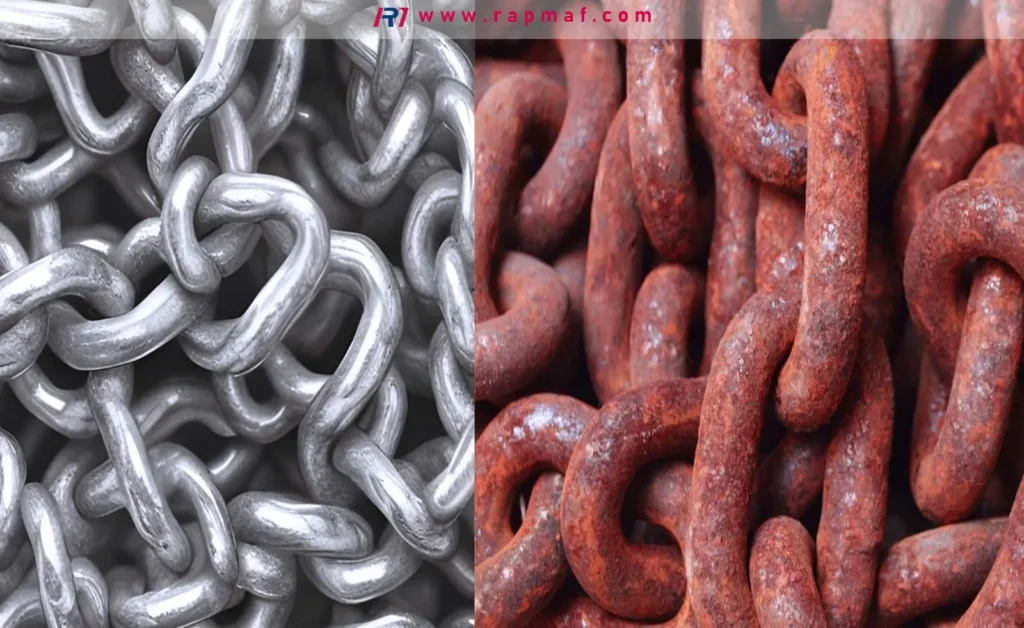
2.Wear Resistance & Hardness: For parts that experience friction, like hydraulic pistons or bearing surfaces, a layer of hard chrome or electroless nickel can dramatically increase their surface hardness and lifespan, reducing wear and galling.
3.Enhanced Electrical Conductivity: Base metals like steel or brass are decent conductors, but for high-performance electronics, they aren’t good enough. A thin layer of silver or gold on electrical contacts and connectors ensures a reliable, low-resistance connection and prevents oxidation that could interfere with signals.
4.Solderability: A bare copper surface oxidizes quickly, making it difficult to solder to. A thin layer of tin or a tin-lead alloy is often plated onto circuit boards and component leads to provide a clean, highly solderable surface that lasts for months.
5.Aesthetic Finish: This is the most visible reason. Decorative plating, such as the bright chrome on a car bumper, the satin nickel on a faucet, or the gold on a piece of jewelry, provides a specific look, feel, and perceived value. But even here, the underlying layers of copper and nickel provide crucial corrosion resistance.
The 7 Core Steps of the Plating Process
While the specifics can vary wildly depending on the substrate, the plating metal, and the desired outcome, nearly every industrial plating process can be broken down into seven fundamental stages. We’ll cover the first four in detail here in Part 1.
- Design Review & Masking
- Cleaning & Degreasing
- Surface Activation (Pickling & Etching)
- Rinsing
- The Plating Bath (Electrodeposition)
- Post-Treatment (Passivation & Sealing)
- Inspection & Quality Control
The golden rule of plating is this: 90% of plating failures are due to improper cleaning and surface preparation. The metal layer we deposit is often only a few microns thick. It cannot hide surface defects, and it will not adhere to a surface that is anything less than surgically clean.
Step 1: Design Review & Masking
The plating process begins before the part even reaches the plating line—it begins at the design stage. An engineer designing a part that will be plated must consider “Design for Plating” principles. Electroplating relies on an electric field, and current flows like water, following the path of least resistance.
- Sharp Edges & Corners: These create “high current density” areas, causing the plating to build up thickly and potentially become brittle. A small radius or chamfer is always preferred.
- Deep Recesses & Blind Holes: These are “low current density” areas where it’s very difficult for the plating solution and electric current to reach, resulting in a very thin or non-existent coating. These are called “hard-to-throw” areas.
Once a part is ready, masking is applied if only specific areas need to be plated. This involves meticulously covering the surfaces that should not be plated with a non-conductive material like a specialized tape, wax, or lacquer. This is a highly manual and skillful process, especially for complex parts.
Step 2: The Critical Cleaning & Degreasing Stage
This is where the real work begins. The goal of this stage is to remove all “soils”—any foreign substance on the part’s surface. These soils can be categorized as organic or inorganic.
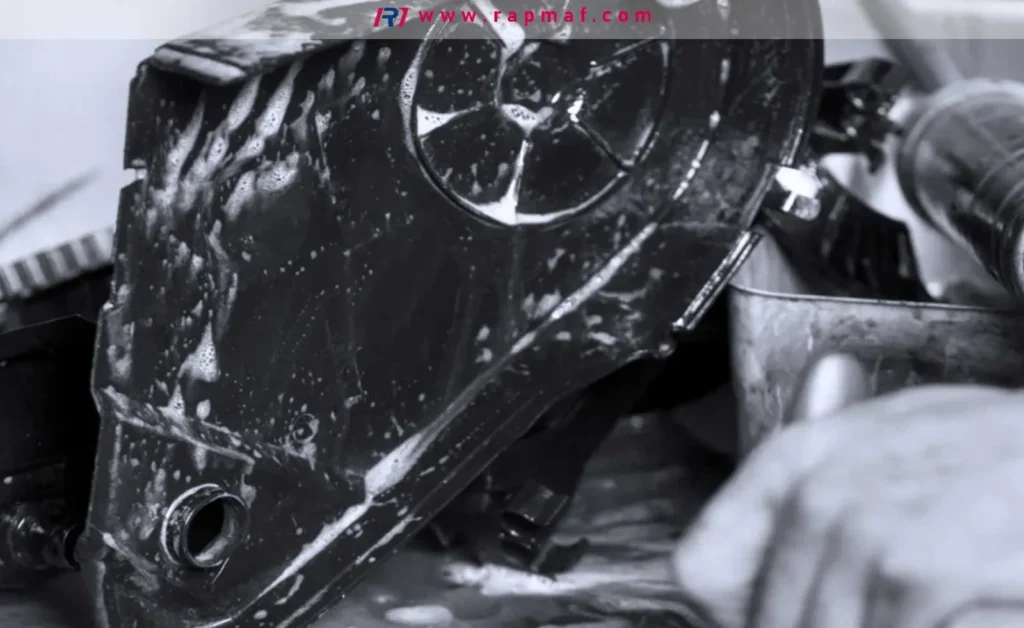
Removing Organic Soils (Degreasing):
Organic soils include oils, grease, lubricants from machining, polishing compounds, and even fingerprints. If even a microscopic film of oil remains, the plating will not stick to the metal underneath, leading to blisters and peeling. There are several methods for degreasing:
- Solvent Degreasing: The parts are immersed in a solvent that dissolves the oils. This is effective but involves volatile organic compounds (VOCs) and is increasingly regulated.
- Alkaline Soak Cleaning: This is the most common method. The parts are immersed in a hot tank of a water-based alkaline solution (high pH) containing detergents and surfactants. The heat softens the oils, and the chemicals emulsify them, lifting them off the surface and suspending them in the solution.
- Electrocleaning: This is the final and most powerful degreasing step. The part is again immersed in an alkaline solution, but this time a DC current is applied, making the part either the anode or the cathode. This causes gas bubbles (oxygen or hydrogen) to form vigorously on the surface of the part. This “scrubbing” action physically dislodges any remaining traces of oil and contaminants, resulting in an exceptionally clean surface. For steel, anodic (or “reverse current”) cleaning is often preferred.
After this stage, the part should pass a “water break test.” When the part is rinsed, a continuous sheet of water should flow off it. If the water “beads up” or separates into droplets, it indicates that an oily film is still present, and the part must be cleaned again.
Step 3: Surface Activation (Pickling & Etching)
The part is now free of organic soils, but it’s not ready yet. The surface is still covered by a thin, invisible layer of inorganic soils—oxides, rust, heat treat scale, and laser cutting scale. These must be removed to expose the pure, raw metal beneath. This is the job of acid pickling.
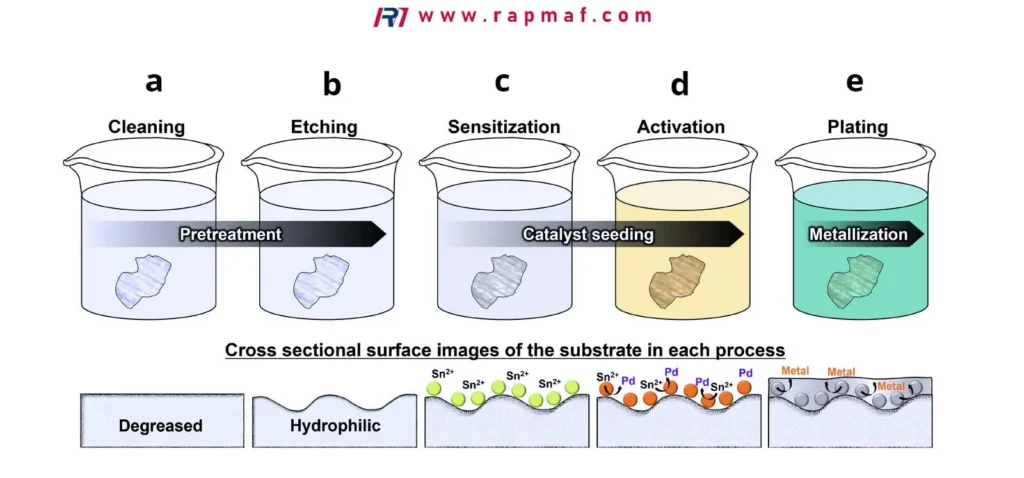
The parts are immersed in a bath of acid, typically hydrochloric or sulfuric acid. The acid reacts with the metal oxides, dissolving them without significantly attacking the base metal itself. The concentration of the acid, the temperature of the bath, and the immersion time must be carefully controlled. Leaving a part in the acid for too long can cause over-etching, surface pitting, and a phenomenon in high-strength steels called hydrogen embrittlement, where hydrogen atoms from the acid can diffuse into the steel and cause it to become brittle.
For some metals, especially stainless steel or very passive alloys, a simple acid pickle is not enough. A more aggressive activation or etching step may be required to strip away the tough passive oxide layer and create a microscopically rough surface profile that promotes mechanical adhesion for the subsequent plating layers.
Step 4: The Unsung Hero – Rinsing
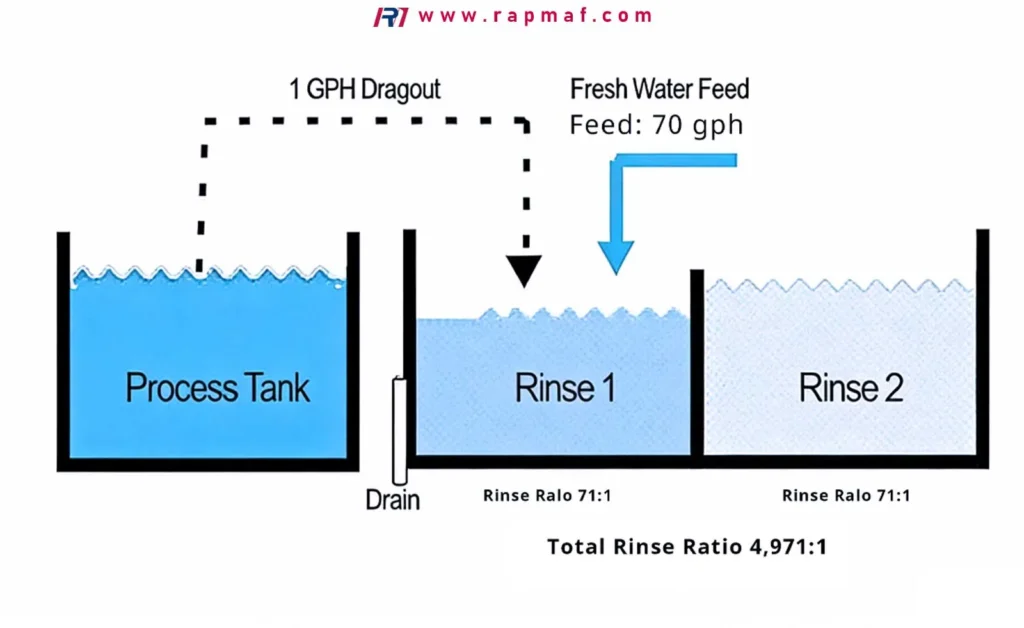
It might seem trivial, but rinsing is a standalone, critical step that is repeated between every single chemical stage. After a part comes out of the alkaline cleaner, it must be thoroughly rinsed before it goes into the acid pickle. After it comes out of the acid pickle, it must be thoroughly rinsed before it goes into the plating bath.
This is done to prevent drag-out. Drag-out is the small amount of chemical solution that clings to the part as it’s moved from one tank to the next. If you drag alkaline cleaner into your acid tank, you will neutralize the acid and contaminate the bath. If you drag acid into your plating bath, you will drastically alter its carefully balanced pH and ruin the entire solution, which can cost thousands of dollars.
Plating shops use multiple rinsing tanks, often with counter-flowing fresh water, to ensure that parts are perfectly neutralized and free of any previous chemical before proceeding to the next step.
Step 5: The Plating Bath – The Heart of the Process
The part, now perfectly clean and active, is lowered into the plating tank. This is where the magic happens. The most common method, electroplating, is an electrochemical process that uses a direct electric current (DC) to deposit a layer of metal onto a workpiece.
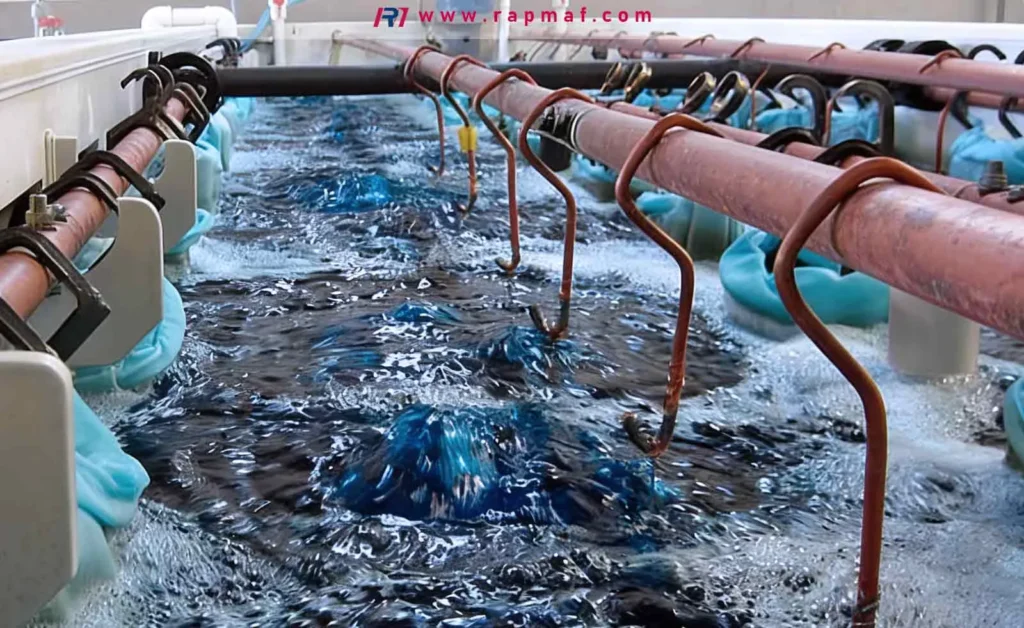
Let’s break down the components of a typical electroplating cell:
- The Electrolyte (The “Bath”): This is not just water. It’s a carefully controlled chemical solution containing dissolved salts of the metal that is to be plated. For example, a nickel plating bath will contain nickel sulfate and nickel chloride, which provide a source of positively charged nickel ions (Ni²⁺). The bath also contains a host of other proprietary additives—brighteners, carriers, and leveling agents—that control the final appearance and properties of the plated layer. The pH, temperature, and chemical concentration of this bath are monitored constantly.
- The Anode (+): These are bars or baskets of the pure plating metal (e.g., pure nickel, pure copper). They are connected to the positive terminal of a DC power supply (a rectifier). When the current is on, the anodes slowly dissolve into the electrolyte, replenishing the metal ions that are being plated onto the part.
- The Cathode (-): This is the workpiece itself. It is connected to the negative terminal of the rectifier.
- The Rectifier (Power Supply): This device converts AC power from the grid into the low-voltage, high-current DC power needed for plating. The amount of current applied (the current density) is one of the most critical process parameters.
The Electrochemical Process in Action:
- When the rectifier is turned on, a potential difference is created between the anode and the cathode.
- At the anode (+), the pure metal is oxidized, meaning it loses electrons and dissolves into the solution as positively charged metal ions. For nickel, the reaction is: Ni → Ni²⁺ + 2e⁻.
- These positively charged metal ions (Ni²⁺) are then attracted through the electrolyte towards the negatively charged workpiece (the cathode).
- At the surface of the workpiece (-), the metal ions gain electrons (they are “reduced”) and are deposited onto the surface as pure, solid metal atoms. The reaction is: Ni²⁺ + 2e⁻ → Ni.
This process continues, building up a metallic layer, atom by atom, creating a uniform, cohesive, and highly adherent coating. The thickness of this coating is determined by Faraday’s Law of Electrolysis—it is a direct function of the amount of current applied and the amount of time the part spends in the tank. A typical decorative chrome finish might be less than a micron thick, while a “hard chrome” coating for wear resistance could be hundreds of microns thick.
The Concept of “Strike” Layers:
Often, you can’t just plate the final metal directly onto the substrate. Some metals won’t adhere well to others. For example, plating nickel directly onto steel is difficult. To solve this, a very thin, highly adherent intermediate layer, called a strike, is applied first. A common sequence for decorative chrome plating on steel is:
- Cyanide Copper Strike: A very thin layer of copper is applied to promote adhesion.
- Acid Copper Plate: A thicker layer of copper is built up to level out any microscopic imperfections in the surface.
- Nickel Plate: One or more layers of nickel are applied. This provides the bulk of the corrosion resistance and the bright, reflective appearance.
- Chrome Plate: The final, extremely thin layer of chromium is applied. This provides the blue-ish tint, scratch resistance, and tarnish-proof finish.
An Important Alternative: Electroless Plating
While electroplating is the most common method, there is another important process called electroless plating. As the name implies, it does not use an external electric current. Instead, the deposition is achieved through an autocatalytic chemical reaction within the plating bath itself. The bath contains a reducing agent that provides the electrons needed to reduce the metal ions onto the part’s surface.
The most common example is Electroless Nickel (EN) Plating.
- Key Advantage: Because it doesn’t rely on an electric field, electroless plating provides a perfectly uniform coating, regardless of the part’s geometry. It deposits evenly inside deep holes, on sharp corners, and over complex shapes where electroplating would struggle.
- Properties: EN deposits are often harder and more corrosion-resistant than standard electro-nickels. They can also be co-deposited with particles like phosphorus or Teflon to create highly specialized surface properties.
Step 6: Post-Treatment – Locking in Durability
The part comes out of the plating bath looking finished, but it is often in a highly active and vulnerable state. Post-treatment steps are essential to ensure its long-term performance and durability.
- Rinsing: Once again, thorough rinsing is critical to remove the highly concentrated and often corrosive plating bath chemicals.
- Passivation / Chromate Conversion Coatings: This is especially important for zinc and cadmium plating. The newly plated part is dipped into a chromate solution. This forms a thin, gel-like “conversion coating” on the surface. This coating is self-healing and dramatically increases the corrosion resistance of the underlying zinc layer. It is also what gives zinc plating its characteristic colors (clear/blue, yellow, black, or olive drab).
- Sealing: A final topcoat or sealant can be applied to further enhance corrosion resistance, add lubricity, or modify the appearance.
- Hydrogen Embrittlement Relief Baking: As mentioned in the pickling stage, high-strength steels are susceptible to absorbing hydrogen during the process. If not removed, this can lead to sudden, catastrophic failure of the part under load. To prevent this, such parts must be baked in an oven at a specific temperature (e.g., 190-220°C / 375-430°F) for several hours immediately after plating. This baking allows the trapped hydrogen atoms to diffuse safely out of the steel. This is a non-negotiable step for critical components in the automotive and aerospace industries.
Step 7: Inspection & Quality Control
The final step is to verify that the entire process was successful and the part meets the customer’s specifications. A variety of QC tests are performed:
- Thickness Testing: This is the most fundamental test. It is measured non-destructively using X-ray fluorescence (XRF) or magnetic induction instruments.
- Adhesion Testing: The bond between the plating and the substrate is tested. This can involve bending the part, heating it, or using a special tape to try and pull the plating off. A properly plated part will show no signs of blistering, peeling, or flaking.
- Corrosion Resistance Testing: The part is placed in a standardized salt spray chamber, which creates an accelerated corrosive environment. The part is checked periodically to see how many hours it can survive before showing signs of rust (red rust for steel, white rust for zinc). Specifications are often written in hours of salt spray resistance (e.g., “96 hours to white rust”).
- Visual Inspection: The part is checked for cosmetic defects like pits, burns, cloudiness, or lack of coverage.
FAQs
What is the process of plating?
Industrial metal plating is a multi-step surface finishing process. In summary, a metal part is first rigorously cleaned and degreased, then its surface is activated in an acid bath. It is then immersed in a chemical solution where a direct electric current (in electroplating) or a chemical reaction (in electroless plating) is used to deposit a thin, adherent layer of another metal onto its surface. Finally, it undergoes post-treatments like passivation and baking to ensure durability.
What are the 7 main steps in industrial plating?
- Design Review & Masking
- Cleaning & Degreasing
- Surface Activation (Pickling)
- Rinsing (repeated between steps)
- The Plating Bath (Deposition)
- Post-Treatment (Passivation/Sealing)
- Inspection & Quality Control
Is there a difference between plating and anodizing?
Yes, a very important one. Plating adds a new layer of a different material onto the surface of a part. Anodizing is a conversion process used almost exclusively for aluminum. It converts the existing surface layer of aluminum into aluminum oxide, which is very hard, durable, and corrosion-resistant. Nothing new is added; the existing surface is transformed.
What determines the cost of plating?
The primary factors are the type of metal being plated (gold is more expensive than zinc), the required thickness of the deposit, the complexity of the part (which affects labor for racking and masking), and the stringent quality control requirements (e.g., aerospace parts require more testing and documentation than commercial hardware).
Final Thoughts
As you can see, industrial plating is a far cry from arranging food on a dish. It is a precise and complex sequence of chemical and electrochemical processes, where every step is critical to the final outcome. It is a powerful tool in an engineer’s toolkit, allowing us to take a common and cost-effective base material like steel and give it the high-performance surface properties of a much more exotic or expensive material. Understanding this process, from the first cleaning tank to the final QC check, is essential for designing and manufacturing parts that are built to last.
References
- ASTM International, B117 – 19, Standard Practice for Operating Salt Spray (Fog) Apparatus. The industry-standard specification for conducting corrosion testing. Link to ASTM B117
- American Electroplaters and Surface Finishers Society (AESF), Surface Finishing Journal. A leading source for technical papers and industry best practices in plating and surface finishing. Now part of the National Association for Surface Finishing (NASF). Link to NASF







One Response
This is 🔥 incredible today